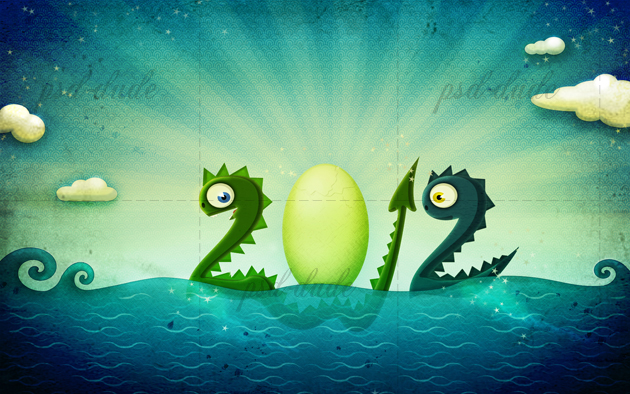
We are welcoming the new 2012 year with a cartoon wallpaper plus a tutorial on how it was made. We hope 2012 will be a good year from all points of view.
As you probably already know the 2012 is the year of the Water Dragonin the Chinese horoscope. So starting from this point we'll create aPhotoshop illustration with 2012 made out of two cute water dragons. This idea is not unique but I hope you'll find the tutorial interesting enough to share it with your friends. Let's start!
 This tutorial is a mixture of vector drawing, digital painting, filters, brushes and textures to obtain abook illustration effect. Actually there are just a few tutorials that creates that kind of effect.
Create a Wallpaper Size PSD
As I have mentioned in my previous tutorials, when I make a wallpaper, I usually create it at 1920x1200 px size. That way, since most people's resolutions are that size or smaller, the wallpaper comes out looking good. So open a new PSD file with this size.
Create the Water Dragon
First we have to download this Lobster font. Unzip the lobster.zip file. Then go to Control Panel, Fontsand click on the File menu and choose Add new font.
When you open Photoshop next time the new Lobster font is added in your list like all the other fonts. It will also be available on other software programs that you have installed on your computer.
Pick the Loster Font from the Set the Font Family dropdown list. Set the Size to 500px, color #3b91a4 and write "2". This will be the Body Layer.

Because I want to further modify the 2 number shape I have to convert the text into shape. There are many methods on how to convert a text into shape but the easiest one is to Right Click on the text and choose Convert to Shape (make sure you have the Type Tool selected).

Now we can use the vector family tools like Pen Tool, Freeform Pen Tool, Ellipse Tool and so on, to change the shape as we wish. I will start with the Ellipse Tool like in the image. Make sure the Add to Shape Area button is selected. And also select the Vector Mask Thumbnail otherwise the Ellipse Tool option buttons will not be available.

To merge the two shapes that are in the same layer make sure you have the Vector Mask Thumbnailselected and pick the Path Selection Tool. Press Combine button.

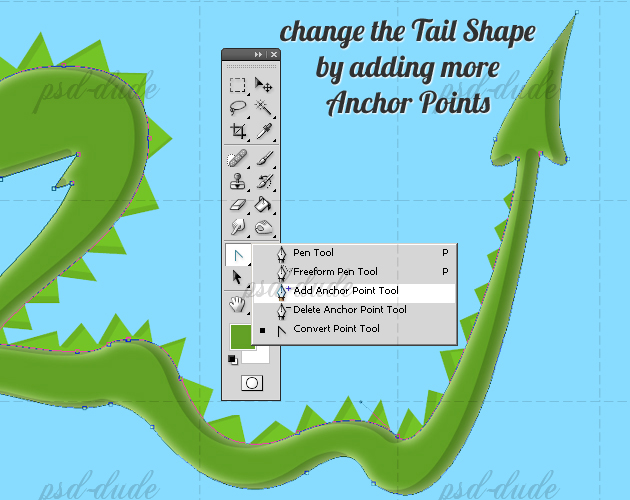
Now all you have to do is to change the Anchor Points position so that you obtain a tail shape. UseConvert Point Tool to select an Anchor Point and move it. You can also add/delete Anchor Pointsto obtain the shape you want.

Open the Layer Style window of this layer and add Inner Shadow, color black.
 Add Inner Glow, color #beeaff.
Adding Dragon's Face and Body Features
To make the number 2 look like a dragon I will now add some dragon scales. Use the Pen Tool and draw them like in the image. Make sure they are in another layer. Add also an Inner Shadow similar to the one you used for the Body Layer.

Our dragon looks like this:

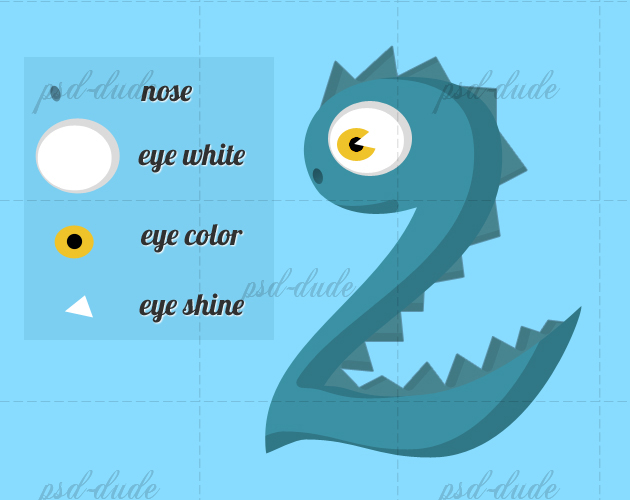
Using the Ellipse Tool add the following shapes for the eye and nose. For the Nose and Eye White layers use an Inner Shadow as for the Eye Color Layer use a radial Gradient Overlay.
Create the Second Water Dragon
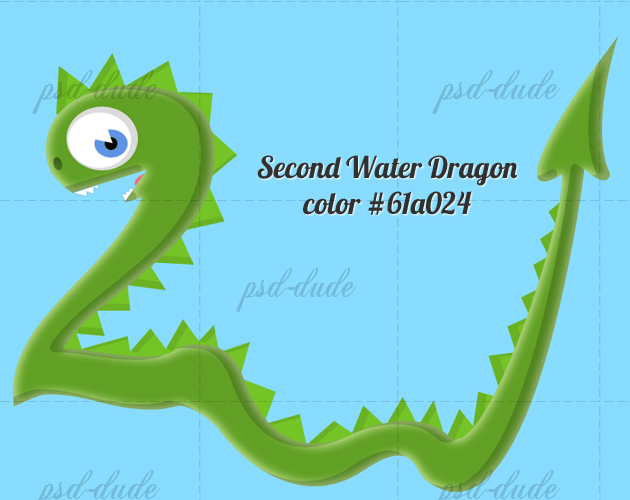
Put all the Dragon layers into a Group and duplicate it. This will be our second dragon. Change the color of this dragon to #61a024. Using the Add Anchor Point Tool change the shape of the Second Dragon Body by adding a longer tail like in the image.
Use the Pen Tool, Substract from Shape Area to make a dragon with the mouth open. Use Path Selection Tool and Combine like in the previous steps.

The only differences from the First Dragon are the Skin Color that is now green, the Eye Color that is now #5e94e4 instead of #efc32a , and I have also added some teeth and a tongue.
Create the Dragon Egg
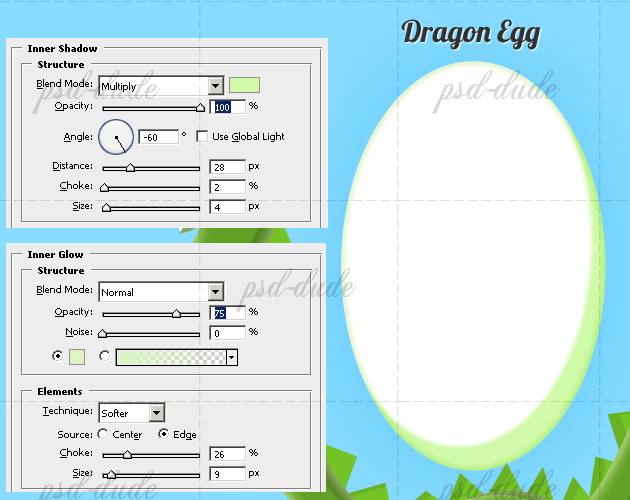
Use again the Ellipse Tool and draw and white Egg Shape. Use an Inner Shadow, color #d0faa8 and an Inner Glow color #ddf3c6.
I will also add a crack effect using the Pen Tool to create the shape. You can also use a Cracks texture or even Cracks Brushes. Place the Egg between the Second Dragon and its Tail.

Create a Sea Illustration Background
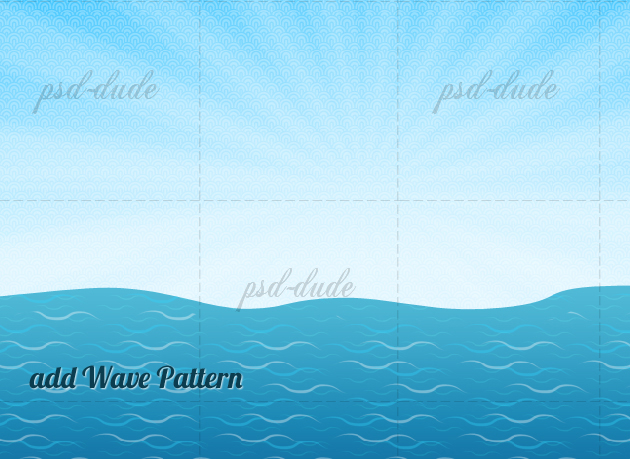
Add a Gradient Overlay to the Background Layer as shown in the image:

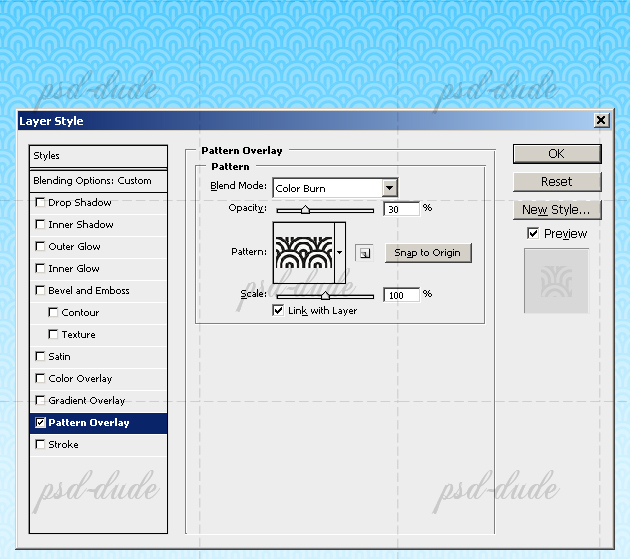
Create another layer above the Bacground Lyer and call it Sea Pattern Layer. Fill it with white color, reduce the Fill to 0% and add Pattern Overlay using this Wave Pattern . Set the Blend Mode of the Pattern to Color Burn 30%.
Now add a Sunburst in another layer using my Rays of Light Brushes. If you want and have time you can create a sunburst from the scratch. Learn how to make a sunburst from this easy to follow tutorial. Use a white color for the sunburst and set the opacity of the layer to 40%.

Add Water Waves using Patterns and Swirls
Use the Pen Tool to create the water surface, use #1c88b5 as color.

Add a Gradient Overlay using the following settings:

Add Pattern Overlay using my Wave Pattern. In the ZIP file you can find the other resources used in this tutorial. Set the Blend Mode to Overlay, the Opacity to 15% and the Scale to 50%. Duplicate this layer, reduce the Fill to 0%, remove the Gradient Overlay and set the Pattern Overlay to Scale 100%, Blend Mode Normal, opacity 100%.
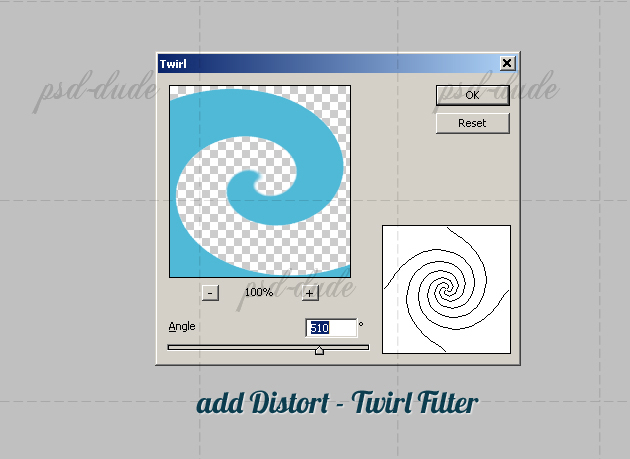
Create a new PSD file 400x300 pixels. Add a Gradient using the Gradient Tool. Use the #50b9d7 color to match the water surface.

Now go to the Filter menu, Distort and choose Twirl Filter. Make the following settings. Now duplicate this layer in our Water Dragon file.
Duplicate the Swirl Wave 3 times and resize them to fit with the rest of the image. Erase the unwanted areas and also adjust the Anchor Points of the Water Surface layer to blend with the Waves.

Merge all the Water layers and reduce the opacity to 90% and place it above the Dragon and Egg Layers.

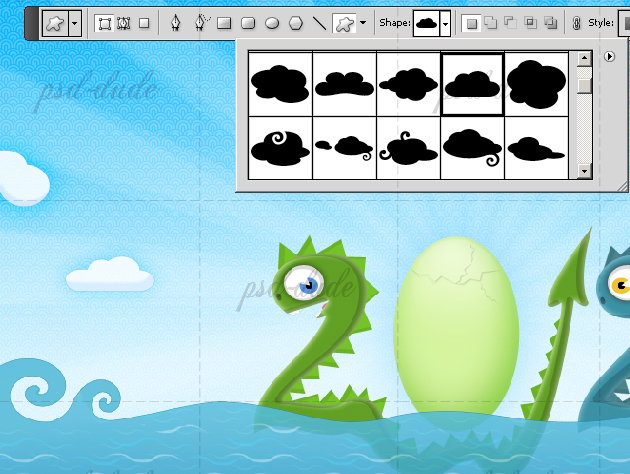
Add Cartoon Clouds
Download the Clouds Shapes and add different clouds on the sky. Add an Inner Shadow, an Outer Glow and an 1px Stroke.

Add Illustration Effects
Now we have to add some effects to this image to turn it into an old illustration. That can be achieved in so many ways. I will start with adding a Curves layer like in the image. Simply press Create a New Fill or Adjustment Layer button from the Layers Tab:

The advantage is that after we add the other layers you can easily change the Curves Layer so that you obtain the best results. Create a new white layer above all the others and call it Vignette. Go toFilter, Distort, Lens Correction and make these settings. Change the blending mode of this layer toColor Burn 80%.

Press CTRl+SHIFT+ALT+E to create a new layer with all the visible layers merged. Make sure you have the Foreground color Black and the Background Color White. Go to Filter, Sketch and chooseGraphic Pen.


Change the Blending Mode to Darken 20% so that you obtain soft scribble lines. Create a new layer and add some Star Sparkles using the Star Brush that you will find in the resources pack. Use white color and size 25px. Add star trails in different areas ofthe image, around the dragons and on the sky for example.

Add an Old Paper Texture in a new layer; use this paper texture and change the Blending Mode of the layer to Multiply 100%. Press SHIFT+CTRL+U to desaturate the image. To create a vintage lookyou can use some Stain Brushes

For the final touches add a Gradient Fill layer and set the blending mode to Color 35%.

Add a new layer and set the blending mode to Overlay. Use a Soft Round Brush to paint with white/black color over some areas like clouds, water to give volum, to create light and dark areas. And that is all.
I really hope you have enjoyed reading this tutorial. You can download the free 2012 Water Dragon Wallpaper.


1 comments:
Please remove this tutorial at once or we will file for copyright infringment.
Post a Comment