Pages

Showing posts with label tutorial. Show all posts

Thursday, 15 January 2015

Realistic Photo Composite From a Sketch in Photoshop

Final Image
When mixing photos, it's often helpful to use digital painting techniques to help improve your scene. In this tutorial, we will show you how to combine several photos to create a realistic scene of a locomotive passing through a desert landscape. This tutorial will begin as a sketch, we will then show you how to combine photo manipulation and digital painting techniques to create finished artwork that looks amazingly close to the original sketch. Let's get started!

Tuesday, 2 December 2014

Create a metalic Style in Photoshop

BACKGROUND LAYER
We start as always with a background gradient. I've used a Radial Gradient with two shades of a lovely light green. The exact color codes are:
Foreground color - #93cc1a
Background color - #7eb704

Monday, 24 February 2014

how to Mysterious Ghost Ship in Photoshop

In this Photoshop tutorial we will learn how to create an emotional dark fantasy photo manipulation featuring a ghost ship with a mysterious figure By following this tutorial, we will have fun while learning how to compose our own ghost ship by combining various stock image through photo manipulation techniques like blending, lightning and using custom brushes.

Final Image

As always, this is the final image that we’ll be creating:

Monday, 15 August 2011

Design A Old Style Photo Effect using Photoshop


Design A Old Style Photo Effect using Photoshop
Today I am going to show you a useful tutorial. In this tutorial you can learn how to create old style photo effect with interesting accent. So let’s have a try…
At first you need to find some appropriate picture for our tutorial. Actually you can find pictures in Google search or use this picture. Open our original picture and apply Image > Adjustments > Hue/Saturation with next presets to change hue and saturation:

Wednesday, 6 July 2011

Rippling underwater explosion photoshop


Final - Result


Step 1: Creating the Bubbles
a) New PSD: 1024×768 @ 72dpi.b) Press D to make sure colours are default.c) Filter -> Render -> Fibers @ default options.d) ⌘I to Invert

Tuesday, 5 July 2011

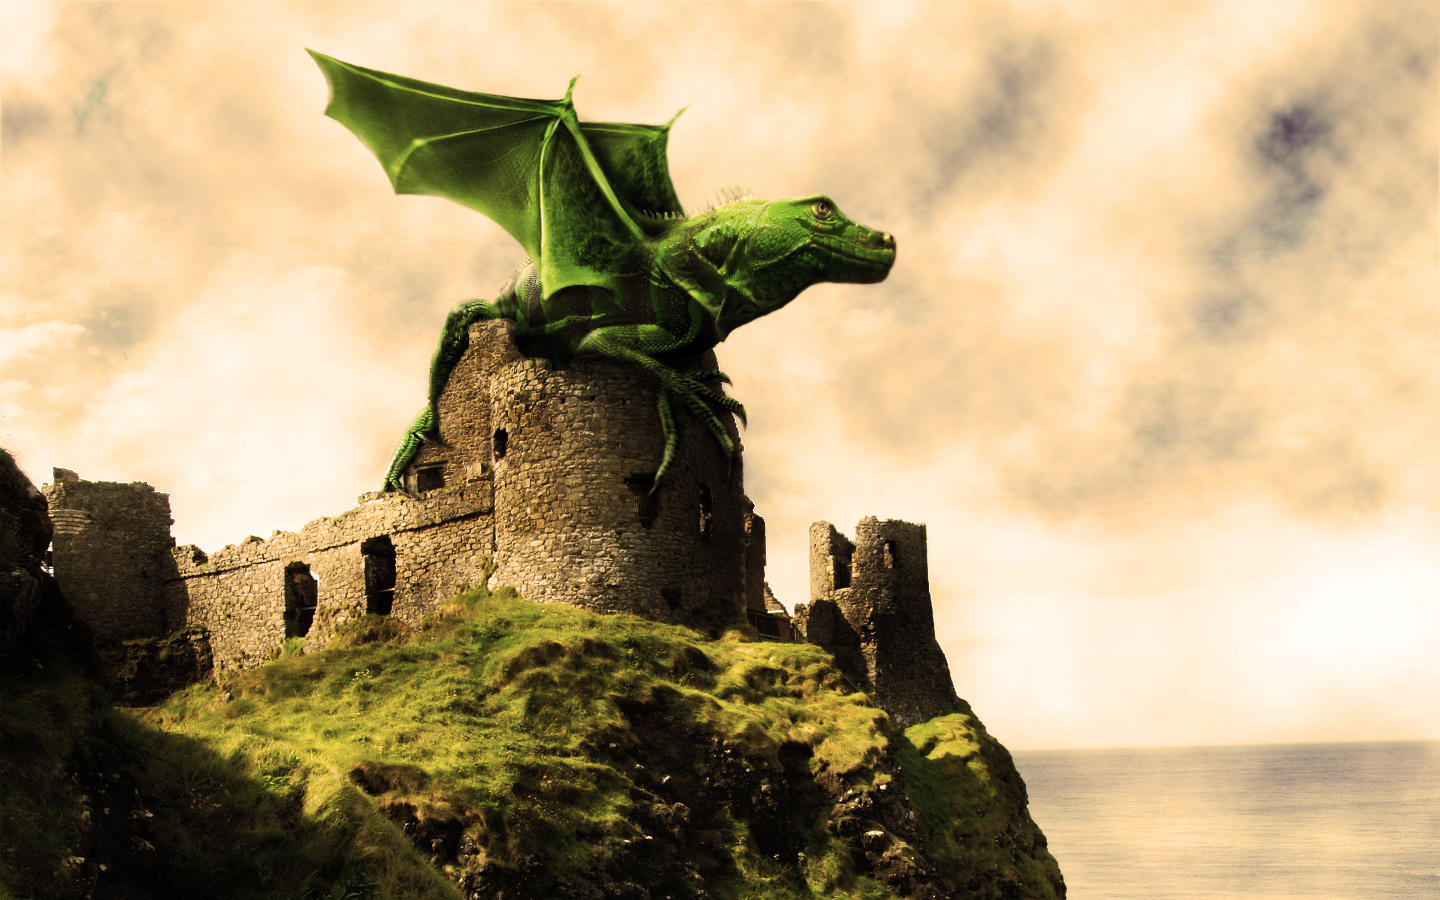
In Photoshop How to Design a Dramatic Winged Dragon


We’ll be creating a fantasy illustration in this tutorial, I’ll show you how to merge two images into one using layer Masks and reshape a picture using the Liquify Filter. We’ll take an image of a baby iguana and another of a bat, then combine the two to create a fantasy dragon. Let’s get started!

Final Image Preview

First, take a look at the image we’ll be creating. Want access to full PSD files and downloadable copies of every tutorial, including this one? You can view the final image preview below or view a larger version here.
Final Click

Thursday, 23 June 2011

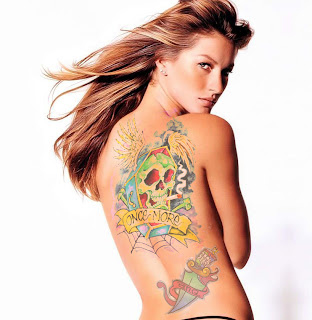
Easy To Add Color Tattoo On Body Make Sexy In Photoshop


Easy to Add realistic tattoo and body Make Sexy art in this Photoshop tutorial using masking And color adjustment, liquify and the re size and transformation tool,This tutorial will show you how you can insert a tattoo design to a photograph with only couple of simple steps in photoshop.

Final Image.

tatoo add sexy Easy To Add Color Tattoo On Body Make Sexy In Photoshop

Sunday, 15 May 2011

Create a Paint Brush in Photoshop


Final Product What You'll Be Creating

Creating still-life objects in Photoshop is often great practice for learning how to create other objects. In today’s tutorial we will demonstrate how to create a realistic-looking paint brush using layer styles, clipping masks, and the not-so-commonly-used blend if sliders. Let’s get started!

Text