In this tutorial we are going to take some very basic principles of light and shade to make a rather impressive-looking text effect.
Light Sources
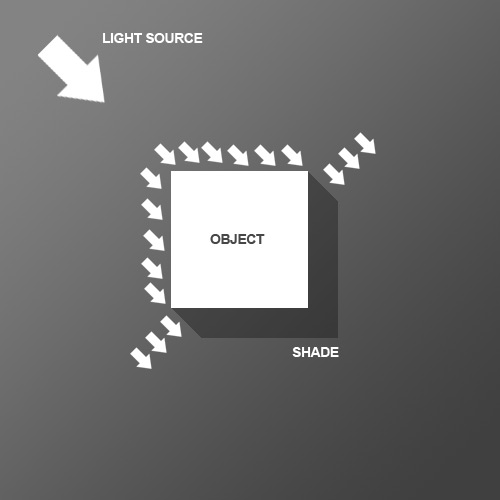
So before we start the tutorial, here is a little diagram about how light might hit an object. Here we have a square object in the middle with light coming from the top left. You can see that where the light hits the object, a shadow is cast on the other side. Note that the shadow is not a Photoshop drop shadow, which makes the object look like it's hovering above the canvas. Here we want the object to look like it's a three dimensional thing stuck on the canvas, extruding if you like. Now tell me what other Photoshop tutorial site gives you diagrams? It's like being back in school!
In this tutorial, we're going to create some really sharp-looking glow effects using a combination of layer styles, the Pen Tool and Color Blending. The end effect is quite stunning and hopefully you'll pick up some tips you didn't know before.
Step 1:
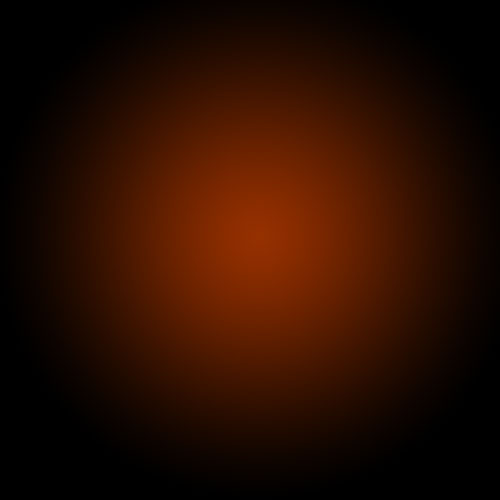
As with pretty much every tutorial I've ever written, we begin with a radial gradient. This one is pretty harsh and goes from a reddish brown color to black. Here are the exact color codes:
Foreground color - #922f00
Background color - #000000
In this Adobe Photoshop tutorial you will learn how to create realistic and creative computer mouse design – Microsoft ARC mouse. If you compare it with the real ARC mouse, you will not find a difference from our design. Mostly we will use Pen tool and color it by shading and highlight techniques using the Burn Tool and Dodge Tool to create a 3D effect. This is a very detailed tutorial which is used more than 70 images to help you easily learn drawing basics in Photoshop. So, lets start to draw.
Recently I was asked to design a T-shirt for the Legnica Fantasy Association, which my sister belongs to. Since it's a non-profit project, I decided to share my creative process with you. I'll show you how to create the idea, how to refine it in Adobe Photoshop, and how to create a two-color, ready-to-print vector out of it.
In
this Photoshop tutorial I’ll show you how to turn a portrait into a
zombie. You ‘ll learn how to use adjustment layers, combine stock images
and work with textures.
In this Photoshop tutorial we will learn how to create an emotional dark fantasy photo manipulation featuring a ghost ship with a mysterious figure By following this tutorial, we will have fun while learning how to compose our own ghost ship by combining various stock image through photo manipulation techniques like blending, lightning and using custom brushes.
Final Image
As always, this is the final image that we’ll be creating:
I have had many requests for tutorials over the past months, but given that they are quite time-consuming to create I have stayed away from them to continue with my poster designs and freelance work.
Last week I posted a few images entitled The O Series. The process behind the images is fairly simple and I thought it would make for a good first tutorial post. There is nothing advanced here, and all you will need is a basic knowledge of the layers palette, blending modes and masks.
So, if you were at all interested in the creation of these p
A happy holiday Quick Tip with Ryan shows us how to create a classic envelope in Adobe Illustrator, using simple shapes, effects, and gradients. After your envelope is created, some simple shadows and gradients create a warm background that makes the envelope look good enough to mail to Santa. I wonder if LoungeKat got him anything for Christmas?
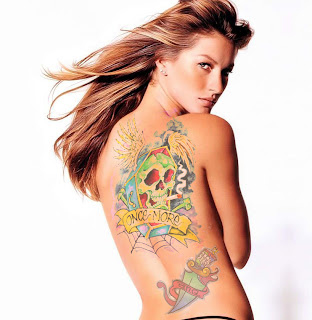
Easy to Add realistic tattoo and body Make Sexy art in this Photoshop tutorial using masking And color adjustment, liquify and the re size and transformation tool,This tutorial will show you how you can insert a tattoo design to a photograph with only couple of simple steps in photoshop.
Create a new .psd file of 2000px width and 3300px height, 72dpi.
Click twice on the Background to make an ordinary layer of it as you’ll need to apply layer style later. Rename this Layer 0 as Background again for your convenience.
In this tutorial, I’ll show you a creative process that gets you using your crazy brain. The workflow for creating the splashes involves taking photographs of thrown paint. Through photography you can capture amazing 3D images without the need for 3D software. Learn to make a splash in your next design.
In this tutorial we will combine several images of water, animals, and people to create a surreal out of bounds photo manipulation in Photoshop. Let’s get started!
In this tutorial I’ll show you how to create an eroded metal text effect. Throughout this tutorial we’ll make use of various drawing techniques, channels, and patterns. Let’s get started!
Final Image
Step 1
First we need to define a pattern of dots. Lets start by creating a new document 100 pixels wide and 100 pixels high, with a Resolution set to 300 pixels/inch. Fill the "Background" layer with black. Grab the Elliptical Marquee Tool, set the Style to a Fixed Size and set the Width and Height to 24 pixels. Click anywhere inside the canvas, then click inside the selection, drag and position it in the top-left corner of the canvas.
Given the right tools, Photoshop can make just about any task easy. Today’s tutorial will demonstrate how to create a still life telephone scene from scratch using the smudge tool. Let’s get started!
Most people don’t realize how much time and effort goes into creating something like an icon. Icons can take many hours to complete and the techniques used can take a long time to perfect. In this tutorial we will demonstrate how to create an open book icon in Photoshop. Let’s get started!






 Step 1: Open a


